| Ton Jaspers talks home-made trailer
accessories (part of an exchange between Ton and Richard Kowski) |
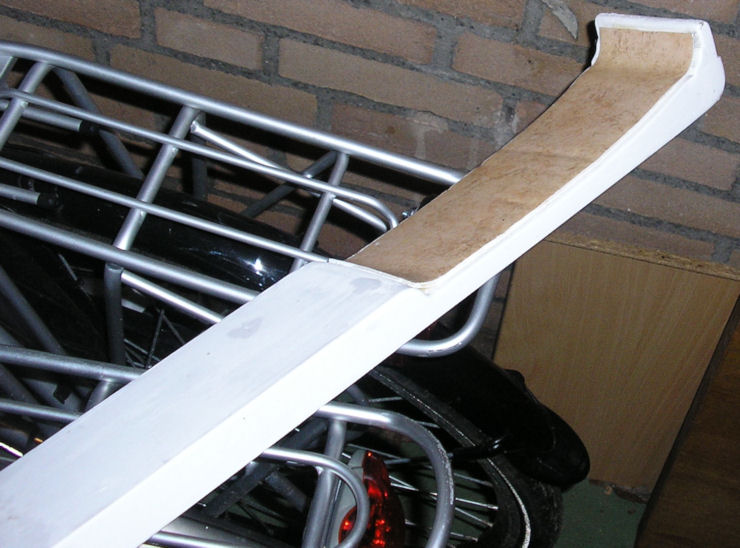 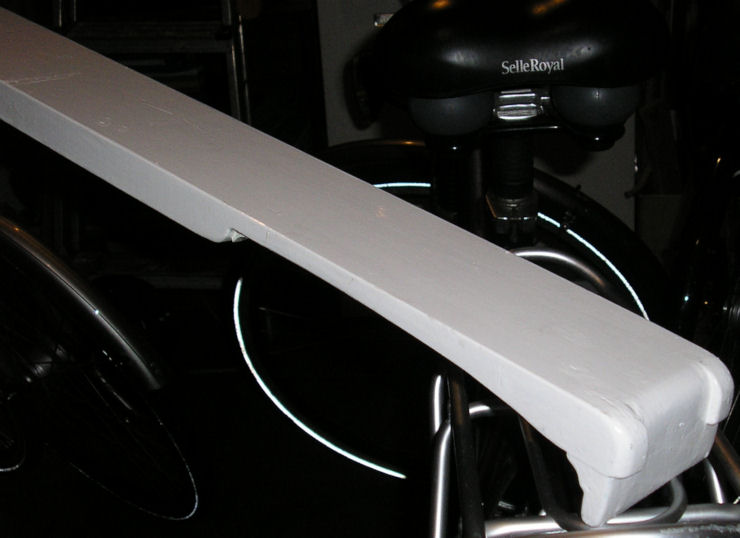 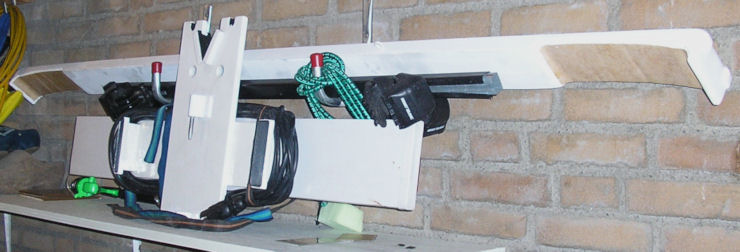 Trailer plank: A wooden plank across the hull with the shape of the gunwales carved in the ends. The ends are coated with some carpet to protect the gel coat. The plank is a few inches wider then the boat so that the ends extend beyond the gunwales. The main strap, that runs over the top of the plank, is kept well away from the hull by the overhang. As an added bonus the hull cannot be compressed sideways, it is only pushed straight down. Richard: The weight must be, as with all boats, on the keel. Obviously you need some support to prevent the boat falling sideways, but on a well adjusted trailer the boat can rock ever so slightly sideways. Make sure the straps don't "push" the boat in to both the side supports, thus changing the weight distribution. Make sure the side supports push at the chines where the hull is strongest. Never support your boat under the bilge keels, it is a sure recipe for breaking the floorboard supports inside your boat. Don't overtighten the straps, the boat must be allowed to move a little. If the package is too rigid something has to break when you hit that unseen pothole. Basically the boat will stay in its cradle without straps. The straps are for security only and don't need to be very tight. They should only prevent the boat from jumping off the trailer/trolley (main strap) and from sliding backward (bow strap).  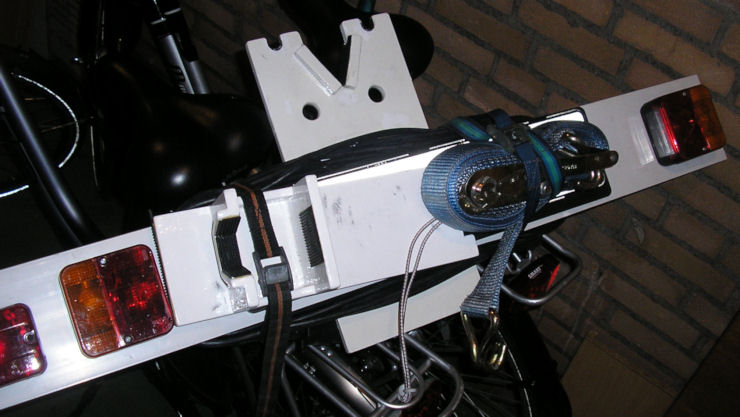 For mast support I made a plywood board with a pintle and gudgeon that fit over the pintle and gudgeon of the boat. The lighting board is screwed to it and at the top there is a mast support that holds the mast well clear of the top of the hull and the trailer cover. In front of the boat there is a mast support that came with the trailer. It holds the mast well above my car and nothing needs to stick out the end - well, it does stick out a little, but just enough to tie the mast to the plywood support. The support board has two small T-shaped blocks at the sides to keep it steady in fixed position parallel to the transom. The T-shape allows me to store the lighting wire if the board is not in use. The lighting wire is run through the boat. This is much easier than underneath it, for it does not need to be fixed to anything inside the boat. I did need to change the cable though, most standard lighting wires are not long enough to run through the boat. The towing crutch is made of two plywood "planks" I had left over from some other job. The dimensions are as they are because the "planks" already had those dimensions. The two planks were glued and screwed on top of one another to form a cross. The upright part of the cross has the mast cradle and the light board was screwed to the horizontal part. At the ends of the horizontal board I glued and screwed two T-shaped stand-offs, also made from some plywood. These T's serve two functions: 1. To stabilize the board on the transom. The length was chosen such that the board is tight against the transom when it is on the rudder pintles. Actually I have to press the board slightly to get it on the pintles. This way it won't rock about. 2. For storing the electrical cable when not is use as shown in the picture I increased the contact surface of the mast cradle with some small pieces of ply wood to avoid point loading the mast. The cradle and the stand-offs were then finished with some left-over rubber from my bin with old junk. Some carpet would do just as well. When I was servicing my CB and rudder I had some white two-pot paint left over. Once mixed you can't save it so I put that on the board giving it its current looks. The gudgeon and pintle were painted too because the bolts are not stainless. 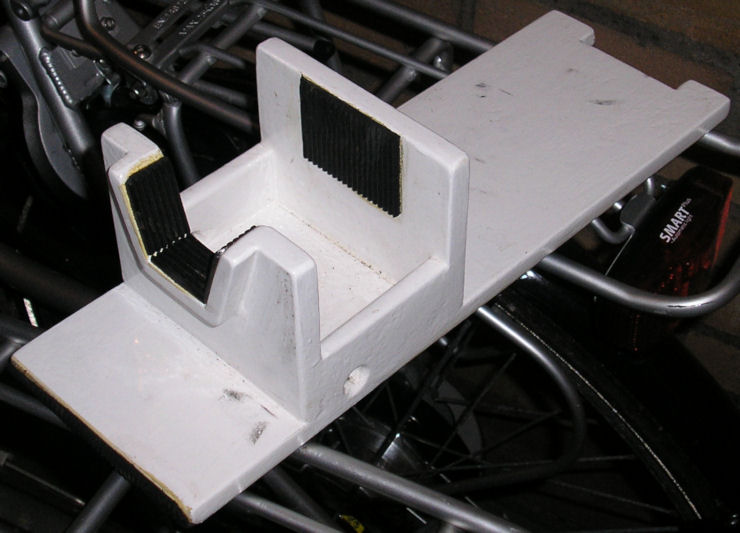 Also I made a boom cradle from the same material. The front of the boom rests on a towel in the mast cut out above the tabernacle. The rear of the boom is in the boom cradle (picture attached). The boom cradle takes care of the following: 1. It prevents the boom from sliding back and dropping from the mast cut out. 2. It raises the boom just over the buoyancy tank preventing it from getting scratched. The bottom of the boom cradle is covered with some rubber also to prevent scratches. The end with the cut out on the right goes against the transom. And the end on the left is fixed in place by closing the tank's hatch. The cradle is then stuck between the transom and the tank's hatch. Again I enlarged the contact area with the boom to avoid point damage. The boom holds the trailer cover in place while I travel, and helps reducing windage. It saves me 10% to 20% on fuel. The next picture shows how I create a single package from the towing crutch, the boom cradle and the straps. This, together with the strapping plank, is all I need to take to the harbour. Because it is strapped together I know nothing is forgotten. I use the following straps: - 1 small one to fix the mast to the fork of the trailer. - 1 small one to fix the mast to the towing crutch. The crutch has two holes for that purpose. - 1 small one to fix the trolley to the trailer and prevent it from squeaking all the time. - 1 large one to secure the boat to the trailer, this strap uses the plank shown in the picture 65, the picture that shows all of my towing gear as it is stored in our bike shack. Also the bow is fixed to the trolley with the painter. The painter is never tight for it would rip the bow fitting from the boat. It is just a security in case the boat should shift aft. 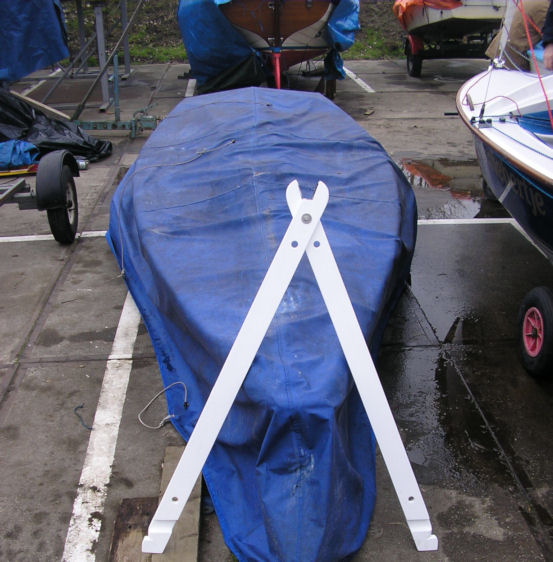 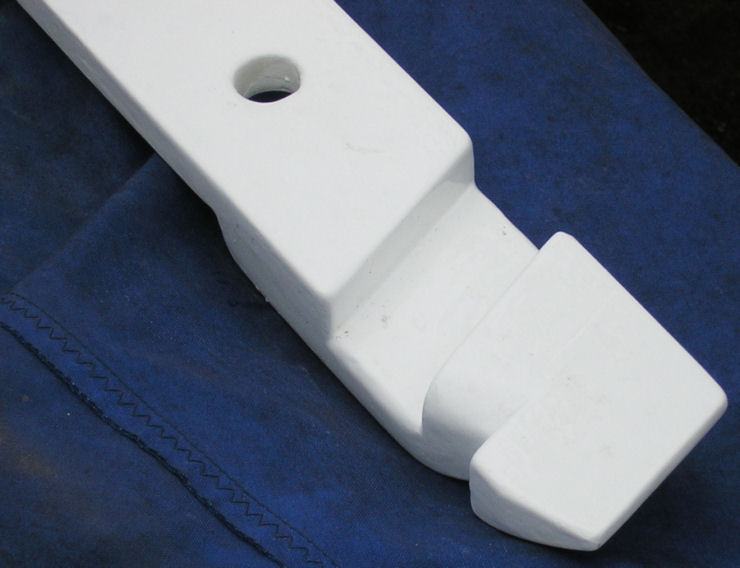  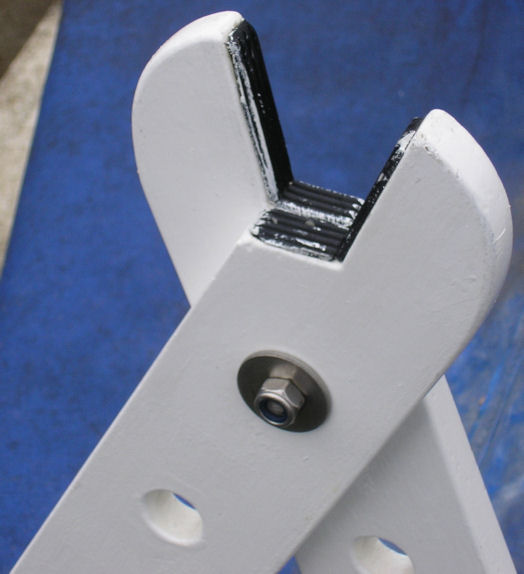 I took the opportunity to take some pictures of my tent crutch, and specially the foot with the cut out for the sheaves for the adjustable main sheet bridle. This shape was made to measure for my boat (2006 plus-S). An exact and tight fit of the foot is what holds the crutch up and it also distributes the load over a larger area. I hope this is the information you are looking for. Always remember there are as many solutions to problems as there are Wayfarer sailors. There is no "best" solution, only a solution that suits you best. Best wishes, Ton Jaspers (W10445 - Swiebertje) |